

-
Check for Cockpit inside Premiere In Premiere
Open Window > UXP Plugins > Cockpit. Cockpit belongs in UXP Plugins, rather than the separate Extensions menu. Open Cockpit from Premiere’s Window > UXP Plugins menu. • Cockpit is listed and opens: Open its Settings and enter your license key if prompted. Then try the popup again. If only the popup’s Settings button still fails, continue to the final section. • Cockpit is missing or won’t open: Continue to step 2. • The UXP Plugins menu itself is missing: Check the Premiere version requirements in the Installation & Setup guide before continuing. SEQUENCE / COCKPIT SUPPORT Installation troubleshooting 2 -
Check whether Creative Cloud shows Cockpit as installed
Open the Adobe Creative Cloud desktop app.
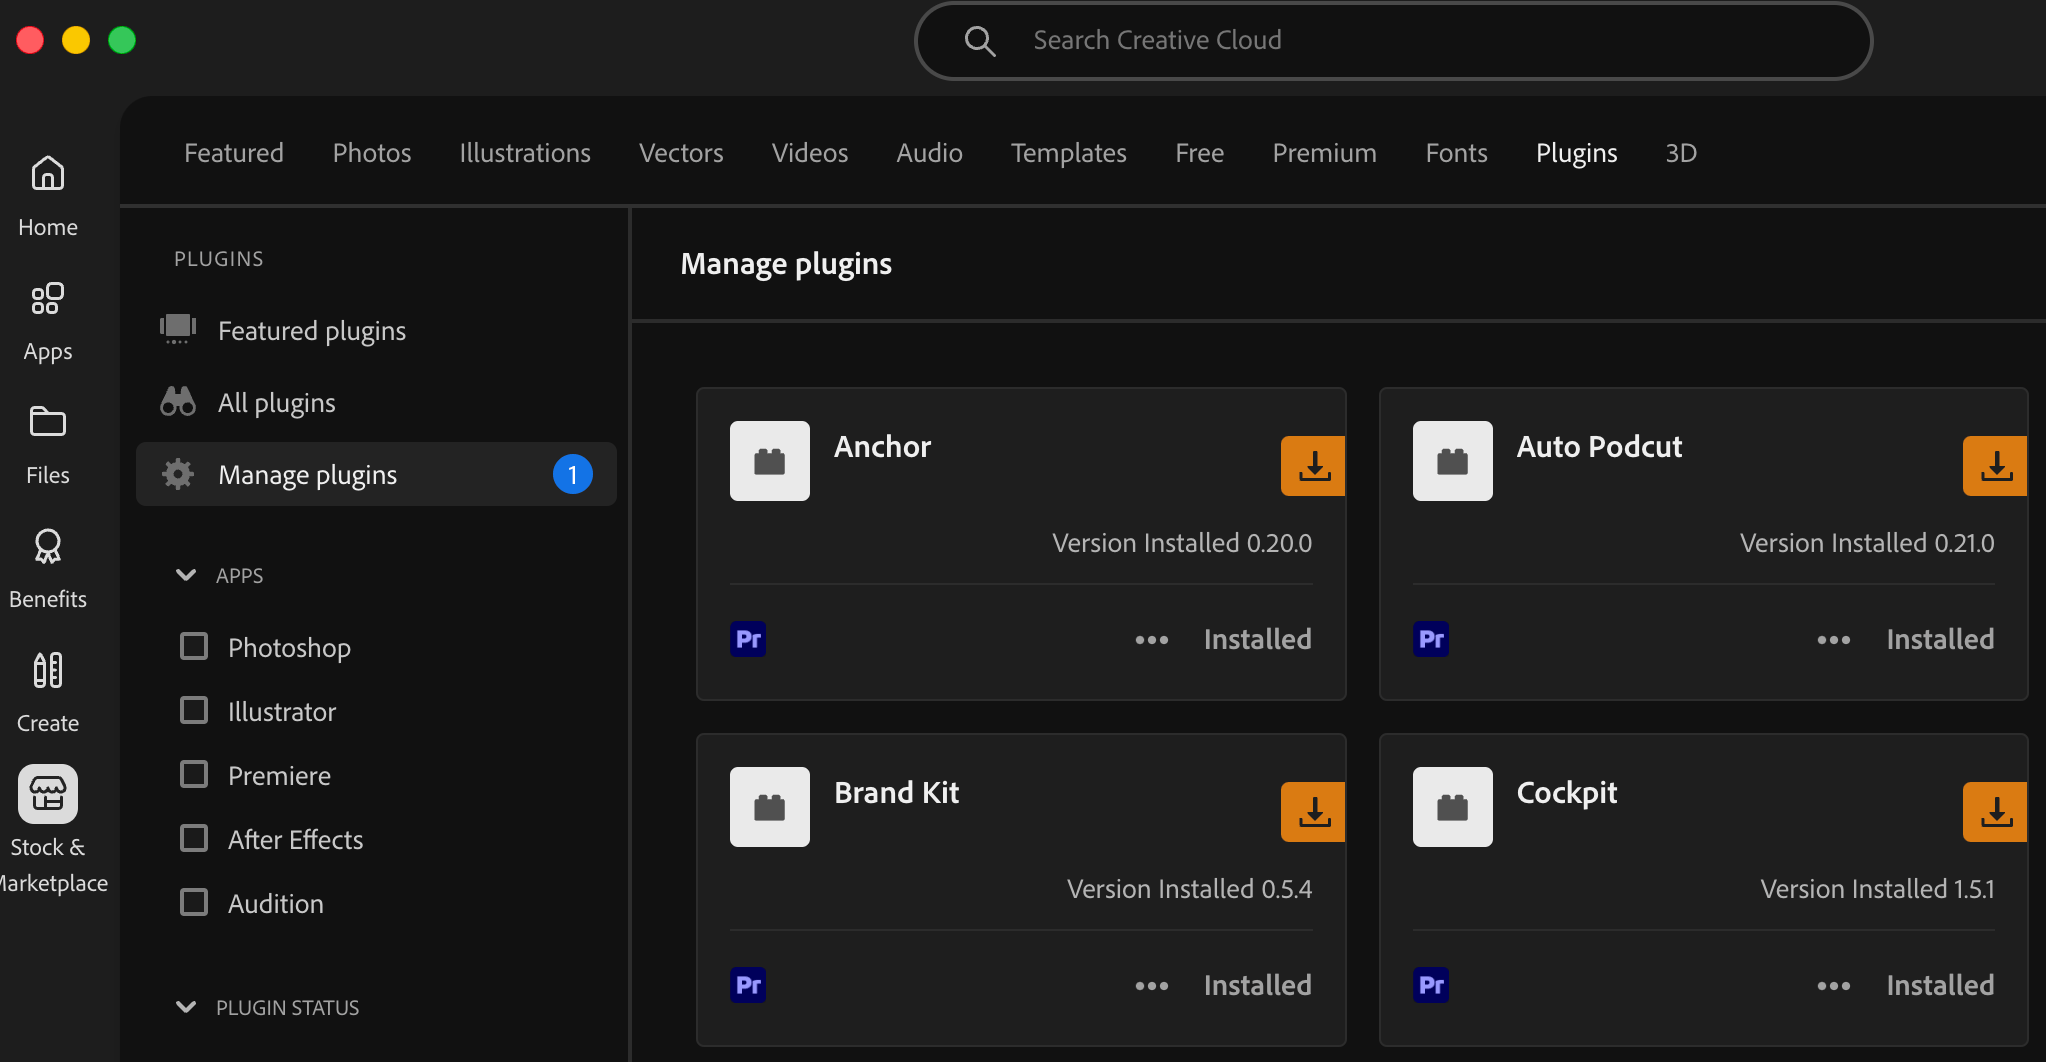
- Cockpit is missing: The Premiere plugin may not have finished installing. On Mac, continue to step 3. On Windows, follow the Windows instructions in the Installation & Setup guide, then check this page again.
- Cockpit shows Installed: Save your work, fully quit Premiere, and reopen it. Check Window > UXP Plugins > Cockpit again. If you have both Premiere and Premiere Beta installed, check which app you reopened; try the standard release as well. If it’s still missing or won’t open on Mac, continue to step 3. -
Reinstall Cockpit on Mac
If the plugin is missing or still won’t open, try reinstalling using the two packages included in your Cockpit download.
1. Save your work and fully quit Premiere. If Premiere Beta is also running, quit that too.
2. Open your Cockpit download folder.
3. Run CockpitHelperUninstaller-[version].pkg and let it finish.
4. Run CockpitHelperInstaller-[version].pkg and complete the installation prompts.
5. Open Creative Cloud and check Stock & Marketplace > Plugins > Manage plugins again. Look for Cockpit - Installed.
6. Reopen Premiere and select Window > UXP Plugins > Cockpit.
7. Open Cockpit’s Settings and enter your license key if prompted. Then test the popup again.

If an installer displays an error, save the exact message or take a screenshot. If Creative Cloud displays a failed-installation notification with a Details link, open it to see the error information.
How to confirm it’s working
Installation is ready to use when: • Creative Cloud lists Cockpit as Installed. • Window > UXP Plugins > Cockpit opens the panel in Premiere. • Cockpit’s Settings opens so you can complete license activation. • The popup works while you’re using Premiere. Once these checks pass, no further reinstall is needed.
Still having trouble?
If Cockpit remains missing after reinstalling, or the panel opens but the popup still won’t open Settings, contact Sequence support with:
- Your operating system and version.
- Your exact Premiere version, including whether you’re using Premiere Beta.
- The Cockpit version or installer filename you used.
- Screenshots of Window > UXP Plugins and Creative Cloud’s Manage plugins page.
- Whether the popup opens and what happens when you click Settings.
- Any installation error and which steps above you’ve already tried.